Artist : 1st Time Oil Paint & Brush Use
So you have all the materials you need to start painting with oils…
or maybe not…
(If NOT, refer to the “List of Oil Painting Materials” article for a
complete list of what you’ll need, as well as a link to an Art Supply Website, where you can order online).
Ok… you want to know how to use these materials & you have absolutely NO idea what to do 1st! Here’s how to start…
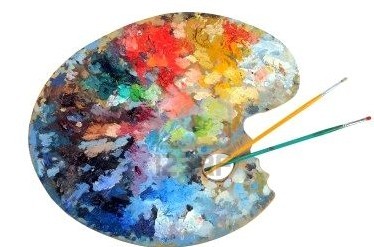
1) I begin by putting out the different artist oil paint pigments on my palette… I prefer to use disposable palettes, they are easy to use; and after transferring remaining paint pigments to another sheet when the palette ‘sheet’ is covered by mixing colors, they can be discarded with less clean-up. (I just cover the palette with clear plastic wrap when I am done painting, to keep paints from drying out). Everyone arranges their pigments differently, I do so in an inverted “L” pattern, starting at the bottom left corner of the palette, and following the left & then top edges; arranged by ‘groups’ of pigments’, (i.e. greens, blues, reds, yellows, as well as white & black). In each of these ‘groups’ of colors; I start with the darkest pigment & end with the lightest. In whatever order you decide to arrange them it should be consistently the same; in order to make it automatic for you to find a particular pigment & spend less time ‘searching’ each time you need one. After you’ve been painting for awhile, you will instinctively reach for each pigment without having to avert your attention from the subject you are trying to paint.
2) Now that you have all your artist oil paint arranged.. you’ll need to make sure you have all your materials set up & within easy reach. Have your oil painting medium & ‘turpentine’ in containers. I prefer using separate baby food jars for the ‘medium’ & a small amount of ‘turpentine’ for mixing; and I use a spaghetti sauce-sized jar for keeping a larger amount of ‘turpentine’ in; (I will be referring to this as the material I use for brush cleaning; although, odorless mineral spirits are actually what I’m using). These containers have lids, so I don’t have to put out more each time I paint; & they won’t dry out or evaporate between painting sessions. I also have a large rag, that I use for wiping my brush on after cleaning it in the turpentine, after I am finished using that particular pigment. I find when I am painting a certain element, that I hold several brushes in the hand I am not painting with. Each brush contains a different color of the element, and I keep the pigment on the brush until I am sure I’m not going to need it again; i.e. if I need that particular brush for a different color. (See more on brush selection in my article; “Like a pen to a writer… a knife to a sculptor“..
3) Now you are ready to start the actual mixing & placing of oil paint pigments on your canvas…
I begin by dipping the brush I’ve selected into my ‘turpentine’, & ‘prime’ it to remove any lint, or foreign objects. This also separates the bristles to ‘accept’ the pigment I’m using. I then decide how much paint I’m going to need for a specific element & use my palette knife, to gather the pigments that I’m going to need to mix to achieve a certain color. It is unusual to use a pigment in the form that it comes in right out of the tube, & generally speaking I add at least some amount of white; or a lighter, ‘opaque’ pigment to it if I am using that pigment by itself; (when I’m NOT mixing a ‘custom ‘color). Many pigments do not possess any degree of opacity, and transparency of colors is not desirable in an oil painting; due to the fact that you never want to see through to the canvas of any painted element. The idea is to make the canvas ‘disappear’… in order to give the viewer of your painting a feeling that the subject is what is REALLY there.
I often use several different pigments to achieve the EXACT or ‘custom’ color I’m looking to create… so wiping your palette knife each time you put it into a pigment is essential to keeping the pigments ‘pure’ & uncontaminated by other colors; (i.e. the way they came out of the tube originally), for the next time you need some.
Another way to keep colors ‘clean’, as I mentioned earlier; is to use different brushes for different colors of pigment. I stock up on several of the same brush types in the sizes of the ones that I use the most often.
Other Oil Painting methods…
BLENDING OIL PAINTS – View my post on this technique… “Blending Elements of An Oil Painting“
OIL PAINTING BRUSH TECHNIQUES – These are dependent on the type of brush you are using & what effect and texture you are trying to execute. Bristles brushes are stiffer & are usually used for larger areas using thicker amounts of paint. They give elements a more textured look, and you will see the brush strokes… whereas soft bristle sable brushes apply thinner amounts of paint & are used to achieve detail & precision, as well as blending; for a smooth texture.
PAINTING WITH A PALETTE KNIFE vs. A PAINTING KNIFE – Most people use the term ‘Palette Knife’ to describe an oil painting tool that is used to apply paint to a canvas in larger amounts, however; it’s purpose is really for mixing or removing paint from the palette & not for painting with. A palette knife blade is usually long & straight, made of metal, plastic, or wood and it either has a straight or slightly angled handle. When I refer to ‘palette knife’ I am referring to either one of these knives, since I too use the term loosely. ‘Painting Knives’ have a flexible metal blade with an angled wooden handle, which helps to keep your hand from touching the painting, and especially any paint that is wet that you have been working with. They are available with different shaped blades such as; trowel, diamond, & pear; and can be used for applying paint in larger amounts than a brush. Some artists paint an entire painting, using only a palette or painting knife.
Once you’ve mastered the techniques of 1st time oil paint & brush use, you’ll want to check out my article on: “Painting Details In An Oil Painting“.